Hello and welcome back to another installment of Basement Builds! I apologize for the long hiatus, I got real busy starting a new job and putting together a band. Most of my effort lately has gone towards writing new music so the tinkering has taken a real backseat. However, as I was working on a riff for a our newest song, I noticed the tone knob on my primary axe was coming loose. This wouldn’t be such an issue had I not just tightened this tone knob so I decided enough was enough and this pot had to go. Time to stop talking about my favorite guitarists and start playing like them.
Step 0: Decide You Need A Killswitch

A loose knob that has got to go.
This is the easiest step of the whole build. I still remember the first time I heard Tom Morello’s guitar solo in Bulls On Parade. I was so blown away that I started experimenting with the toggle switch on my own Univox Les Paul copy. Being a pretty cheap starter guitar I broke the toggle switch almost instantly by violently throwing it back and forth. I then asked my dad to help me wire a killswitch into an old patch cable and in that moment my whole life changed. I became much more excited about the guitar knowing that I could do these mods myself to completely change the instrument. I think it was that moment that sealed my fate and lead my to pursue a degree in engineering but that’s not important right now. We are here to talk about how to wire your own killswitch which brings my to step 1.
Step 1: Remove Tone Knob (optional)
I have labeled this step as optional because you do not have to remove the tone knob to add a killswitch. If you want to drill an additional hole in the body of your guitar and put the killswitch in that hole, by all means go for it. I don’t really use the tone knob on this guitar though and didn’t want to do any drilling so am using the existing hole.
The tone knob is quite easy to remove. Simply pull the knob off the shaft and the remove the nut and washer. The remaining part of the tone knob (the potentiometer) may fall into the body of the guitar but that is okay. we will be opening the back in just a minute to get that out.
Finally, take the back panel off your guitar, pull the potentiomenter out of the whole, put the nut and washer you removed back on for safe keeping and use a dab of glue to secure the potentiometer out of the way. The potentiometer can be removed entirely if you are good with wiring but this is a very risky move and could end up costing you a lot if mess up and have to get something repaired.
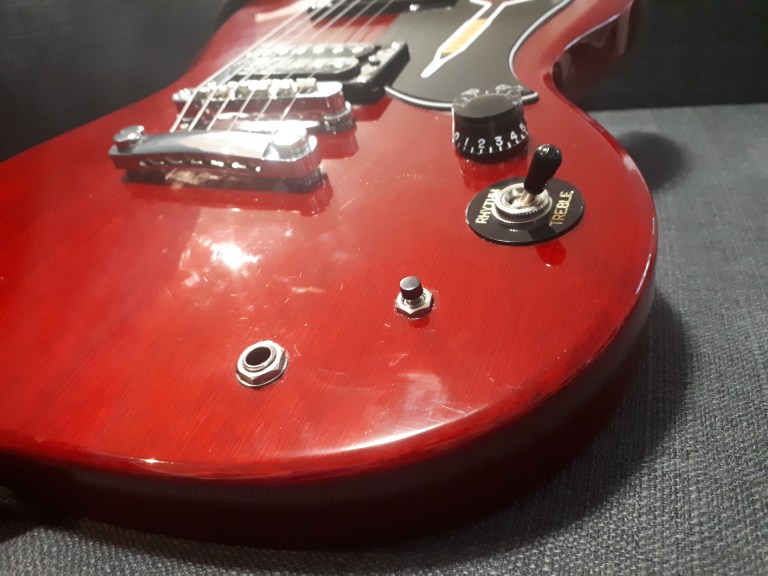
Step 2: Add Button

Secure the button tighter than the knob
Once the tone know is removed and out of the way we add a button to the hole that is now vacant. I used a little bit of Loctite and some pliers to make sure the button would not come loose like my tone knob did. It is very important that you use a normally open momentary switch. Any other type of switch will have to be wired differently. Normally open means that current will not pass through the switch until the button is pressed. Momentary means the switch will not ‘lock’ into place when the button is pressed like a guitar pedal would. Here I should have included sketches of my circuit but I did not plan this build out like my others. This was an impulse build that I did out of frustration towards the loose tone knob. I do not recommend winging your guitar mods unless you also have a degree in engineering but if you also have a degree in engineering then you already know better than to go about projects without a plan.
Step 3: Wire Button

b.eng not required but recommended
Once the button is securely in place, you will need to wire it up. This is where it is important to know what kind of switch you have. Since I have a normally open switch I had to wire it in a way that would not effect the signal passing through the guitar until the button was pressed down. To do this, I connected the two leads on the button to the two terminals of the input jack. When the button is not being pressed the two terminals of the input jack are not connected and the signal will pass through the electronics of the guitar as it normally would. When the button is pressed it will create a short between the two terminals of the input jack creating a path of less resistance. Now given the option of passing through the button or passing through all of the guitar’s electronics, the signal will choose the button thereby ‘killing’ the guitar. I put a little but of red electrical tape over one of the terminals of the button so there would be no chance of the two leads touching each other and turning my switch into an always-closed instead of normally-open.
Step 4: Rock Like Your Heroes
Now that your kill switch is wired up you can put the back panel back on and rock out like your favorite killswitch-using guitarists. Leave a comment and let me know who inspired YOU to install a killswitch.

You go man. Very cool descrptive mod.
LikeLiked by 1 person